Permaculture is thoughtful and protracted observation, rather than thoughtless action.
Permaculture design relies on an in-depth understanding of your site and personal context. This princple is the same whether you are working on designing a regenerative farm, your home and garden or a people based or organisational system. You will need to spend time observing on your land, researching your local area or interviewing clients.
On this page you’ll find help, tips and tricks to help you when designing. All designs start with you defining your goals. This is also a form of observation – to first understand what it is you are trying to acheive.
1. Set your goals!
- What is it you are trying to acheive?
Are you going to design a grey-water system for your home? Is it because you are trying to save water use in your garden? Is it because you want to stop pollution from your site? Is it because you want to demonstrate grey-water systems? Is it because you want to build community by creating a grey-water system together?
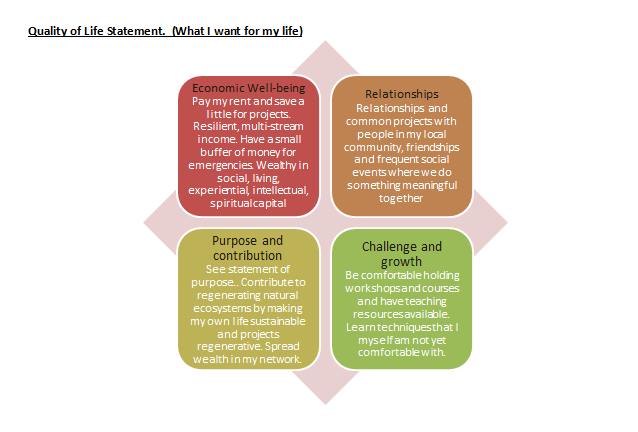
Here it’s clear to see that there are many motivations for designing a certain element. Being clear about why you are doing something will make the design process much easier and will also make it possible for you to measure if your design was actually successful! - What are your priorities? Maybe you’re working on a building project and you want to live up to certain and specific sustainability goals. You also need to keep to your budget and the home will need to function properly for you. You will want a good indoor climate. Have you got an idea of how highly you prioritise each of your goals? For a design to actually embody permaculture, it will need to live up to the ethics of earth care, people care and fair share – but within these ethics there are lots of different options…prioritising is one way to later narrow down your options to design decisions.
- Are you goals SMART? SMART goals are specific, measurable, acheivable, realistic and time-bound. An example of a SMART goal could be: This season I want to produce a vegetable box every week for 8 families. In three years I want to expand my production to produce a vegetable box a week from march-october for 21 families.

2. What is your holon?
- A holon is a system within a system. Undoubtable the system you are designing will be a part of an even larger system, and that larger system will also just be a holon within a wider system.
- Outline the boundaries for your design. What are you designing and what are you not designing? This is where designs can get complicated and seem unattainable. How can I make decisions here if I don’t know about this other factor? The main way to remedy this in site-design is by starting with the overall site-design – or at least a basic idea of it – and then ducking into the smaller systems and their details. (This is a representation of the principle “Design from Patterns to Details”) Design is anyway cyclical and we can make small tweaks later, but we need to get the permanent structures right from the beginning, otherwise we will expend unnecessary effort and resources fixing things later.
3. Surveying a Site (land-based design)
- Wander the boundary and do it often. Do it at different times of the day and different times of year
- PASTE – This reminds us to survey Plants, Animals, Structures, Tools, Events. The site may seem like an empty field today, but if there is a huge music-festival held on the land for one week every year- this will obviously mean extreme changes in your design considerations.
- DAFOR – comes from the study of ecology. When looking at plants you could use this acronym to get a good all round idea of plant-life on your site.
DAFOR is Dominant Species, Abundant, Frequent, Occasional, Rare - Indicator species? Are there any indicator species (either plant or animal) that can give you clues as to how we can work with nature and design the land to fit with it’s current conditions.
- You could find a “Sit Spot”. A place to sit in stillness. To watch, listen, smell, sense your site for an hour or so every day, at the same time every day.
- Soil survey – finding out about soil structure, texture, soil life, organic matter, soil type and differences across the site. What is the pH of your soil? You could also look at local geology and how that will affect your site and design decisions.
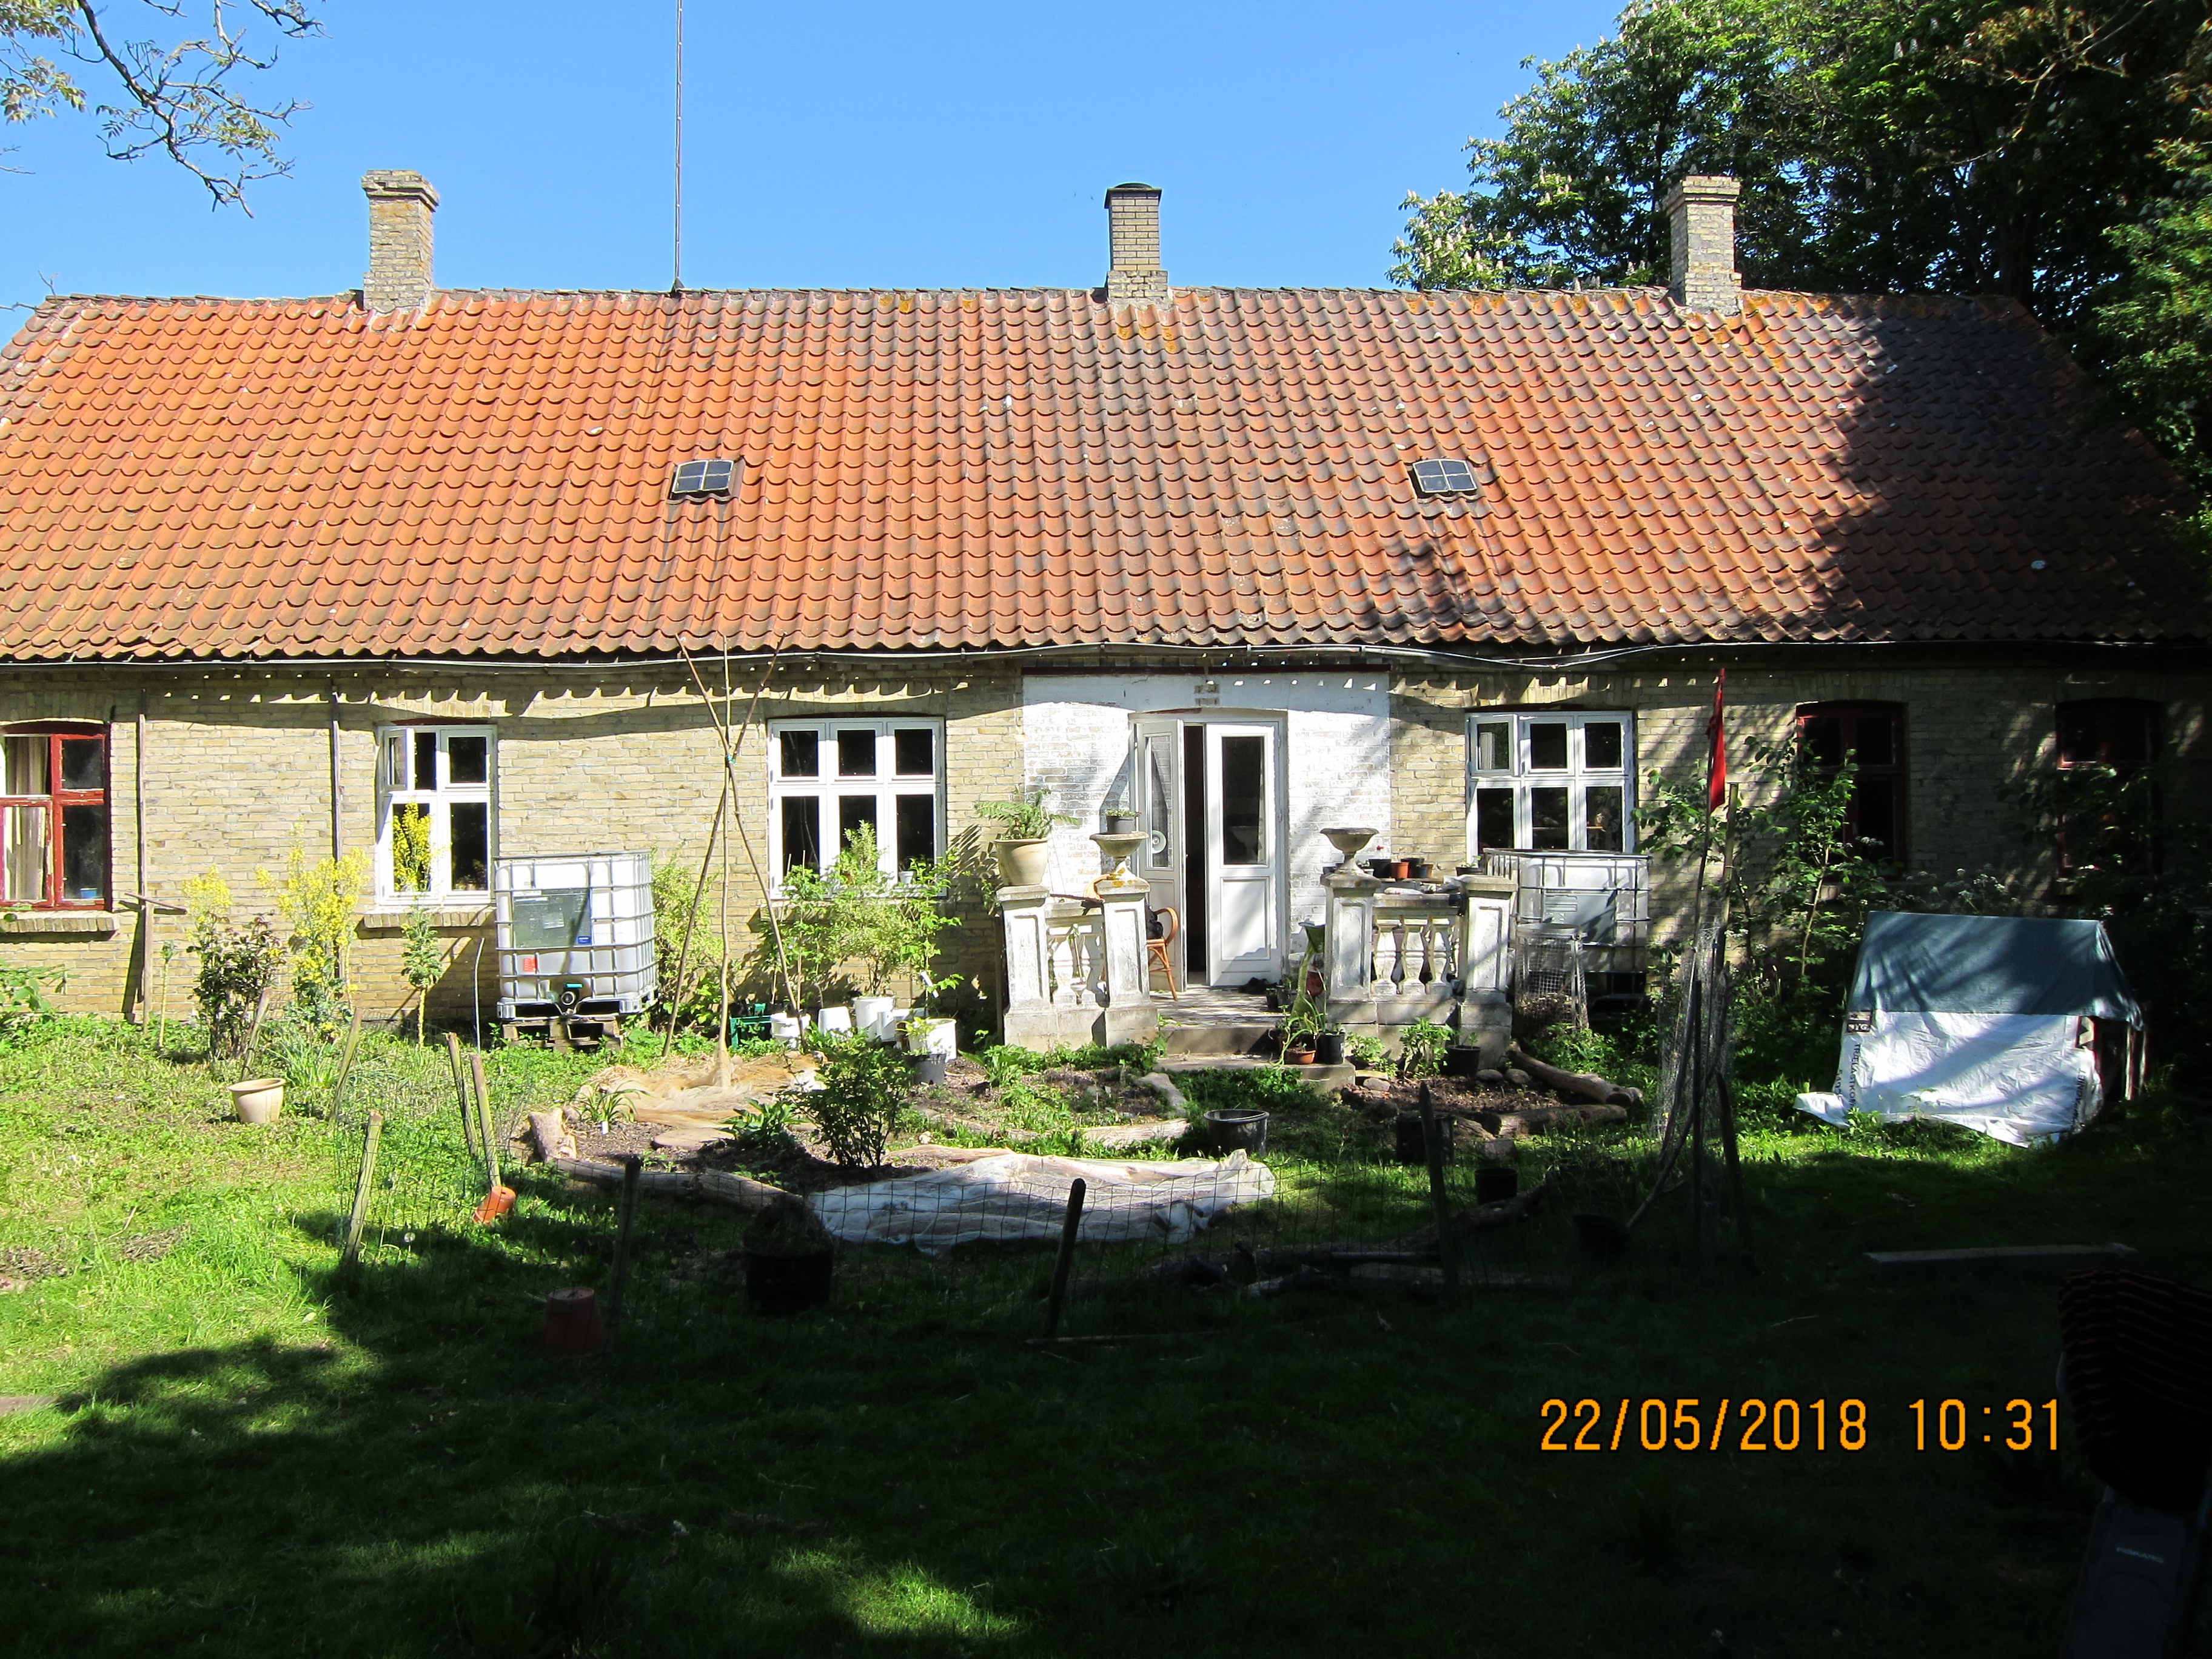
- Sun and Shade – Once you have your base-map, you can begin to add overlays, by drawing on your observations of shade on site. You could also use different colours for deep shade, partial shade, light shade. This shading will have a strong effect on your design as you might find out you only have two small spots on your site where it would make sense to grow sun-loving annuals. Taking pictures with a time-stamp could help you to draw your overlays, and to remember how your site looks in summer when trees are in leaf. (see image below)
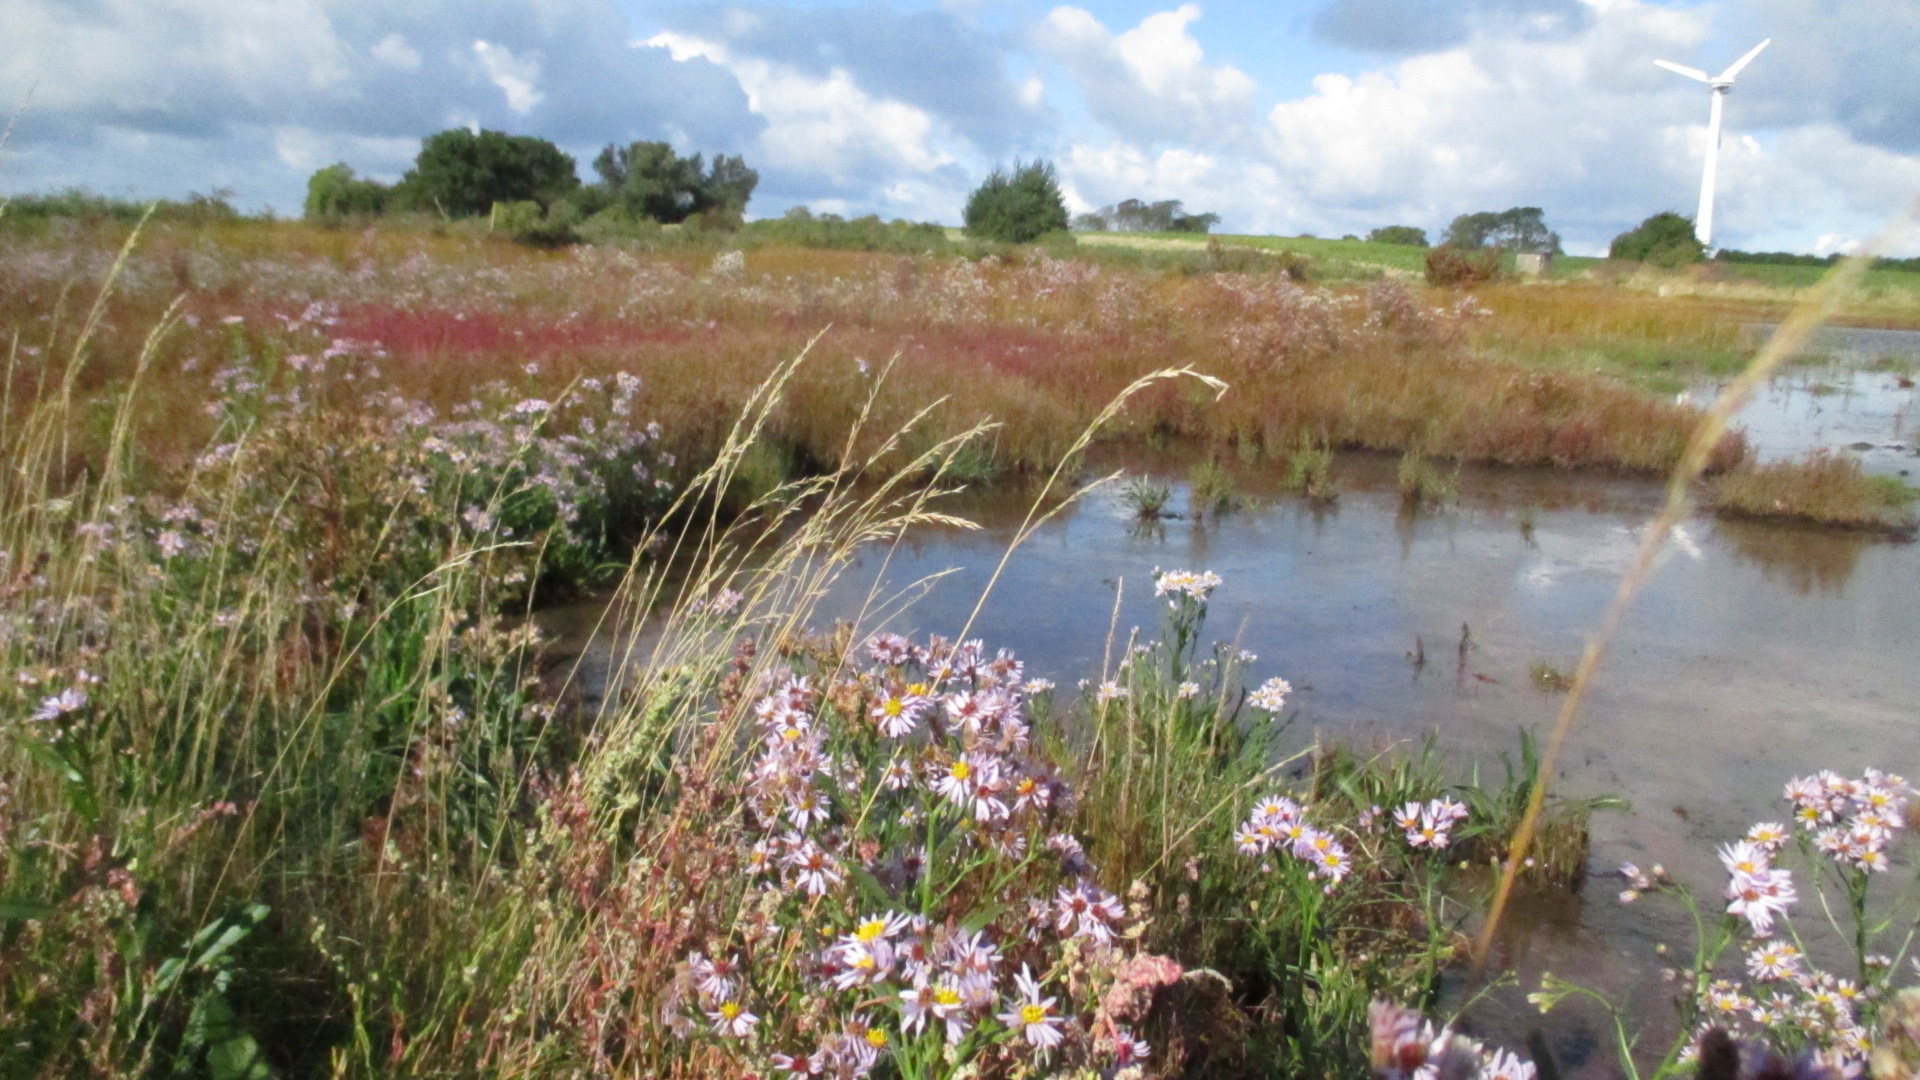
- Sectors – Sectors means analysing your sites flows in general. This could be the sun’s path, cold winter winds, fire and flooding risks, noise pollution, beautiful or not so beautiful views, animal movements like grazing deer or people on the farm, run-off from surrounding hardscape, pesticide drift from a neighbouring field and so on and so on! There are almost endless kinds of flows on every site, so you will need to decide which ones are important for your design and then observe them carefully.
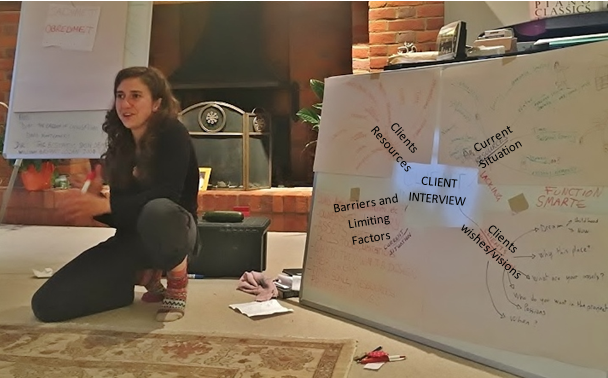
4. Understanding People (Land and People Based Designs)
Permaculture design is about fulfilling human needs in ways that can improve overall ecosystem health. Humans will be the ones implementing and maintaining the finished design, as well as living with the results. If your design doesn’t take into account your specific context, you might make a lot of decisions that in the end won’t get done, because it’s unattainable for the people who live or work on site. This is why permaculture is never copy and paste. You can’t just build a hugel bed or a herb spiral and call it permaculture. Those are methods and permaculture is about design, ethics, principles and ways of thinking.
When designing a site you will therefore need to know about your client or clients (maybe the client is you!)
- What are the clients goals? (Have a look at the goals section above for ideas)
- What are the clients skills and abilities?
- What other resources does the client have, or have access to?
- Any specifics about their personality? Do they love to be outdoors and be active or are always too busy and stressed out?
- What do they like about the site as it is and why?
- What don’t they like and why?
- How much time do they have to implement the design, and how much time do they realistically have for maintenance throughout the year and the changing seasons?
- What is the budget for implementation and what are the limits for running costs?
- Is the budget available from the very beginning, or will you have to design ways to also bring an income, so that some design elements can be implemented at a later date?
- What are there barriers and limiting factors? Is it time, money, skills, grumpy neighbours, local planning laws?
5. Limits/Barriers and Resources
A good way to look at resources is by mind-mapping. What resources do you have around you? It could be materials, skills or close friends with expertees in a subject. This is also where you could look at budget and other forms of wealth. Something you will need to be adept at when improving your permaculture design skills, is seeing resources around your site and in your local community. Waste streams can be intercepted and these wastes used as resources for your design. To see or imagine where these waste streams might be you will need to have a pretty good understanding of your context and local area. The more you know about your locality, the more you will see these resources.
The fruit orchards around my home give us firewood (they are pruned every year and the larger logs are just a hassle for the growers who have large areas to take care of) This firewood would be made to wood-chip and driven off in a lorry if we didn’t intercept the stream and make use of it locally. This resource is relatively obvious, but if you worked in the apple orchards for a few seasons, you would also see other “waste” streams such as packaging from fruit, strings and cardboard from the packery – some of which could be put to good use in the garden.
Limiting Factors on your site could be strong westerly winds or a lack of money. You might however find ways to mitigate these limits with some of the resources you just identified. Budget may be a limit but you might be able to save a lot of money if you can intercept a waste stream and fetch building materials when you see a large building being demolished. The wind may be a limit but if you have abundant brush from a neigbouring orchard clearance – then you would be able to build brushwood fences to mitigate strong winds.
Usually if you can identify your limits and barriers in the beginning, you will be able to design your way around them. If you have a sneaking feeling that something will be a problem, then you need to identify your way around it and the resources that can help you to overcome these.

Conclusion
Observation is an extremely important part of permaculture design and will be the first thing you do on any project.
It’s important that we observe without judgements and without already making plans for what will end up where. It’s about impartial observations and not guesses, ideas and solutions to problems. This is why many designers who work as consultants prefer to observe a site alone, and also get a look at it before the client interview takes place – so they can have an impartial view without being influenced by the clients wishes and ideas.
If you are just in the observation stage and you start to get ideas – you should write them down so you can come back to them later. Then you can start to ask yourself – why did I think that was a good idea? What functions was I trying to provide for with that idea? You might find that one of your ideas actually will fit in the design – but only when you have much more information and you are at the stage of evaluating and analysing your options.
We are trying to work with nature and have the greatest effect for least effort. We need to recognise that everything has an effect on it’s environment and we need to be aware of the conditions on site as well as the clients specific situation.
This gets easier the more designs that you do – and the more varied the design and site. Then you can really start to begin to see the overreaching characteristics of a place. A site with extreme shade and moisture? A school where children use the space more than anyone? A sunny patch of lawn that is never visited?
!! Observation of designs is ongoing – we also need to watch and see how well they work so that we can make adjustments and improve them continuously. Small and slow solutions will hopefully ensure that any negative effects from a design can be caught and remedied before they lead to destruction of environment or natural resources. We are designing to regenerate natural resources, so let’s observe and see if this actually happens. Did we save energy? How much food did we produce? Is our soil improving?
HAPPY DESIGNING!
(Doing nothing is also an option……..)
